I have been using a Dell XPS 13.3 for the last few months and am loving it. It’s portable, light, got an amazing FHD screen with almost zero bezel and fast. Until recently it has been perfect, however I have started using virtual machines for work projects so the 256GB SSD quickly started to take strain. I thought I’d just get a larger SSD, make a clone and will be up and running in no time. I was wrong, very wrong!
I went for a Samsung 500GB M.2 SSD and because my XPS only has one SSD socket, I bought a M.2 SATA to USB 3.0 enclosure too. That was the easy part done. The ‘fun’ was only just beginning.
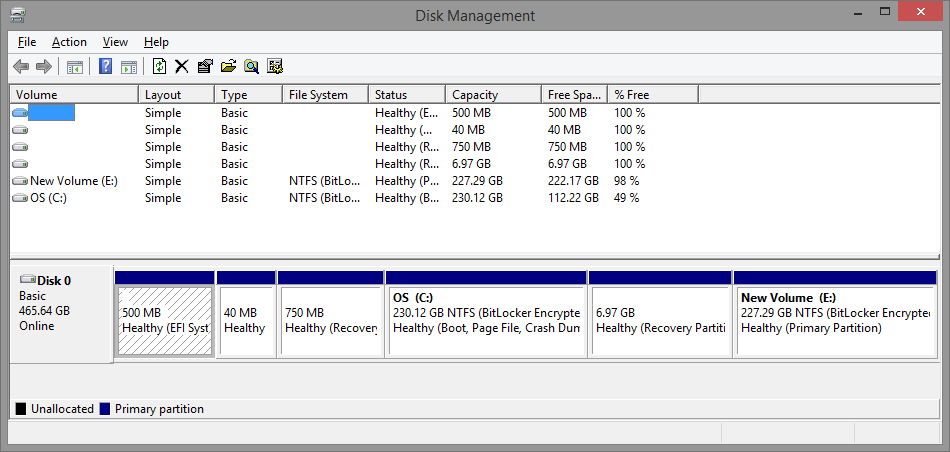
When looking at the original SSD in Windows Disk Management , you will notice that there are a few hidden partitions where Dell keeps OEM data, recovery partitions and the main C:/. I needed to clone all the partitions over to the new SSD which was connected via USB 3.0.

I will start with the program that I ended up using, and then mention a few that I didn’t and why they didn’t work for me. This is not a step-by-step guide, as I am already working on my new SSD. It’s more for information and choosing a program to use.
Macrium Reflect
I came across Macrium Reflect by chance and I am so glad that I did. It was by far the easiest to get working.

All you need to do to get going, is install the software, I included Windows PE support for drivers in case they were needed. Connect your new SSD to a USB port. If the SSD is brand new and never been plugged in before, you will need to initialise the SSD using Windows Disk Management. Once the SSD is initialised and has a drive letter assigned to it, you are good to go.
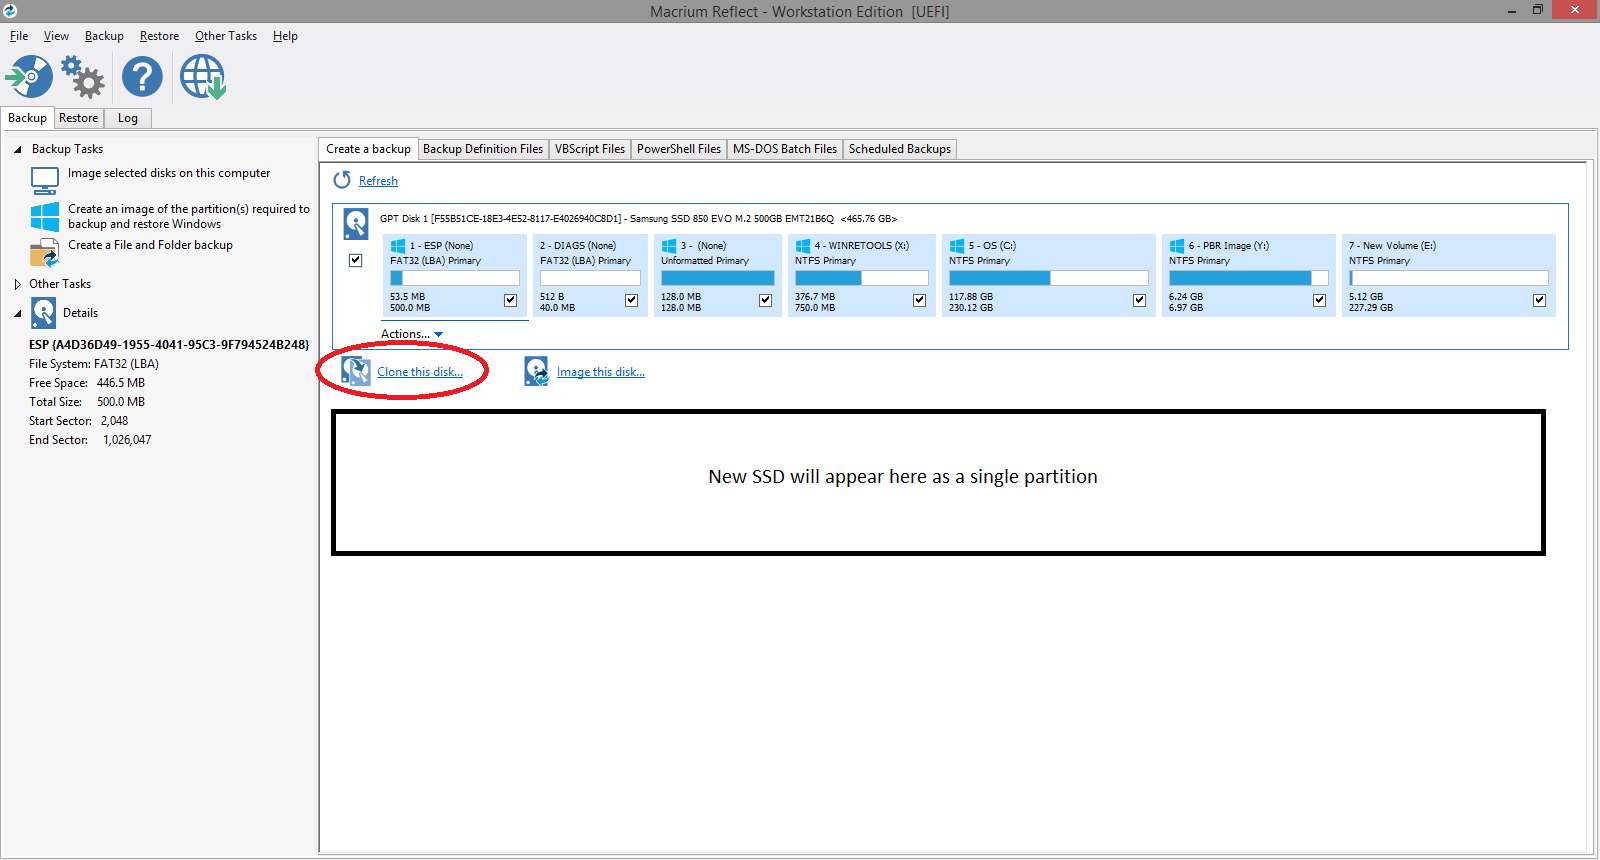
Once Macrium Reflect is installed and your new SSD is plugged in, run the software which will look like this.
I made sure all other applications were closed and once ready, selected ‘Clone this disk…’.
The source disk will be the disk currently running and the destination disk will be the new disk connected via USB. Follow the prompts selecting the options that suit your installation and then run the clone. The clone I did on a 256GB SSD took around 1 hour to complete. After each partition is complete, a Windows Explorer window will open showing the newly cloned partition.
Once the clone is complete, shut down Windows, replace the SSD in your laptop with the newly clones SSD connected via USB and boot your laptop. My first boot took a few seconds longer than normal, but everything started perfectly.
Because my new SSD was double the size of the old SSD, there was an uninitialised partition at the end of the SSD. Using Windows Disk Management I initialised and assigned a drive letter to that partition and now I have loads of extra space to use.

Programs that did not work for me
I am going to quickly cover the programs that did not work for me.
First I tried DriveImage XML as a many articles that I read suggested this application. The main reason I decided not to use this was you are only able to clone a single partition. I’m sure this works well when you have done the initial installation yourself into a single partition, but most PC’s/Laptops’s come with OEM installed Windows which includes multiple partitions.
I then tried EaseUS Partition Master as it was also a free application. This required making a Linux boot disk which you boot off and then you select which is your source and destination disk. Unfortunately when I booted off the boot disk, the SSD connected via USB was not recognised.
Thirdly I tried Acronis True Image 2015 which I bought a licence for as disk cloning is not supported in the trial version. Acronis True Image also uses a Linux boot disk to clone from one disk to another. When I first tried it, I had the same problem as EaseUS Partition Master where my the SSD connected via USB was not recognised. After installing the multiple media packs and spending hours on forums, I decided to look for another application as the workarounds mentioned seemed totally unreasonable for a paid, licensed application.
Conclusion and Solution
After many hours and multiple reboots, I finally found Macrium Reflect which worked first time, perfectly. From download to rebooting on my new SSD took less than 90 minutes, and I didn’t have to worry about making Linux USB boot disks. I highly recommend this program for performing clones on Windows disks. I am going to look at using it for my file and systems backups too. They also offer a free version that is loaded with features for non-commercial use.
As usual if you have any questions or comments, feel free to get in touch via Google+ or email.
Greg
