I have been rather busy over the last few weeks at work. The inspiration for blog posts hasn’t been flowing that well so I decided to put a list of a few simple tips together. Although I have been using LabVIEW for a few years, these are things that I have only recently come across that have made my programming life that little bit easier/efficient.
Array element names:
One of the great things about arrays is that you can change the settings of on element and that change gets applied to each element inside of that array. I came across a use case the other day where I wanted each element in the array to have a specific name. Due to the nature of arrays, each element’s properties are identical, this cannot be done.
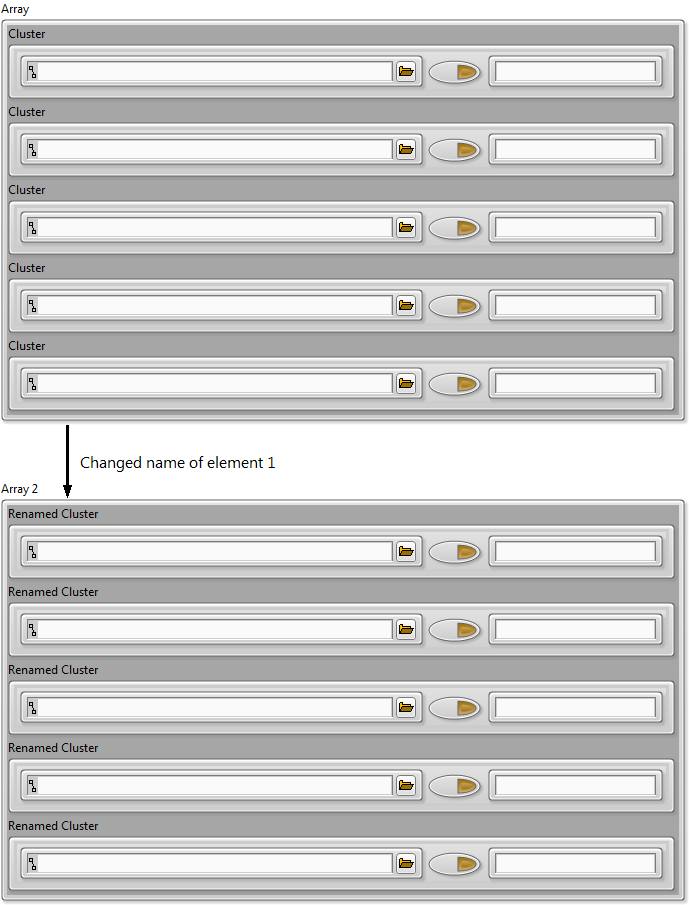
A way to get around this is to add a string indicator to the cluster and place it where you want the name to appear. Then when you create the array, all you need to do is specify a name for each element using a Bundle by Name function. The best string to use is a Classic >> String & Path >> Simple String and then make the background transparent.
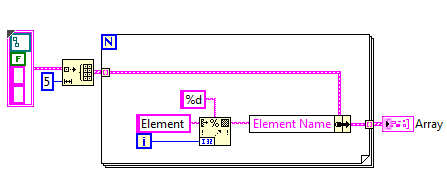
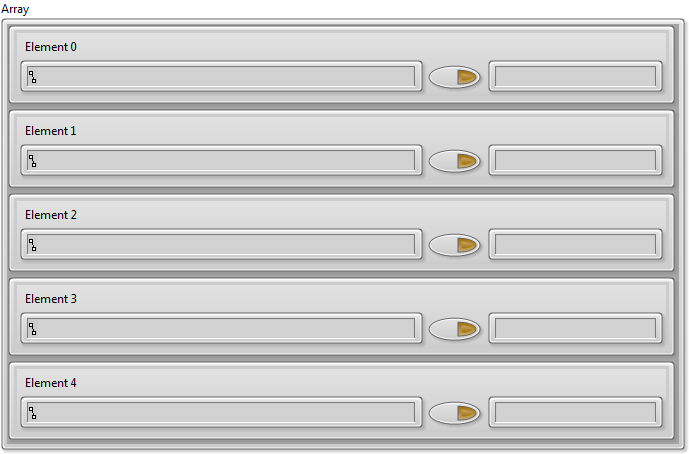
By initialising the array first, you can name each element. You still have all the control as you would normally with the array functions, this just provides a neat way to display arrays on a front panel.
For Loop efficiency:
If you have a For Loop and each iteration does not rely on the previous iteration, there is an option which can be enabled which can speed up the execution of the entire for loop. For small For Loops this most probably will not make much difference, but when working with large For Loops which process a lot of data, you should notice a difference.
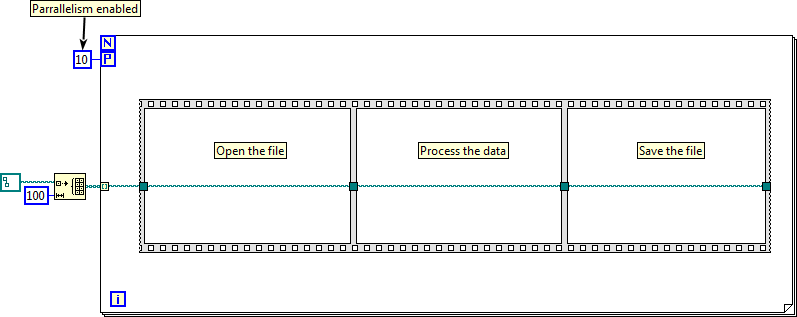
By right clicking on the For Loop, select Configure Iteration Parallelism…
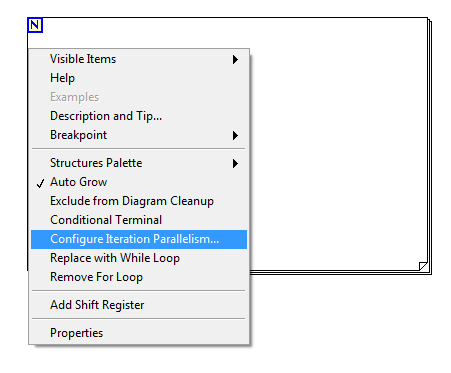
Enable the setting and you will notice ‘P’ terminal has been added below for ‘N’. By setting this number, 10 in the above example, you are saying that instead of executing a single iteration at a time, you want the first 10 iterations to execute in parallel, then the next 10 and so forth.
Case Structure efficiency:
When I am using case structure with an enum as the selector, I always wire up my error cluster, data cluster and any other wires that are shifted between cases using the Linked Input Tunnel option. This means that whenever you create new cases within that structure, the wire automatically gets wired.
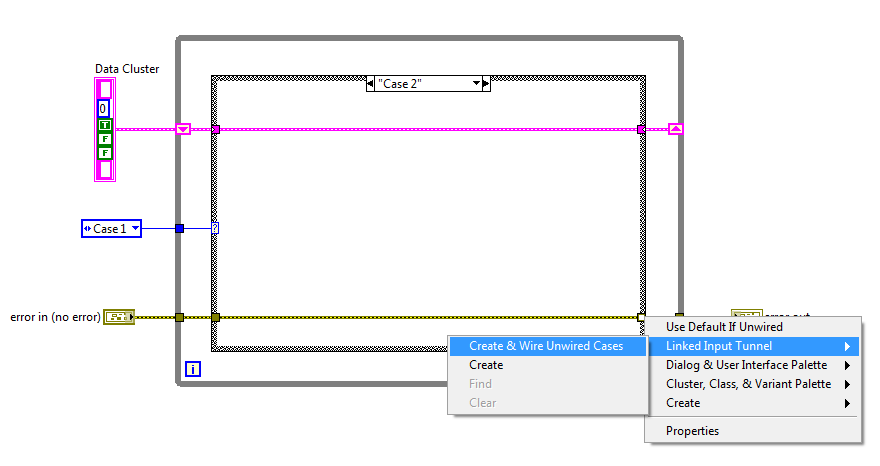
This might not seem like such a big deal, but does help when pushed for time. It is also pretty easy to forget to wire a terminal up and have to come back to it when you have a broken run arrow.
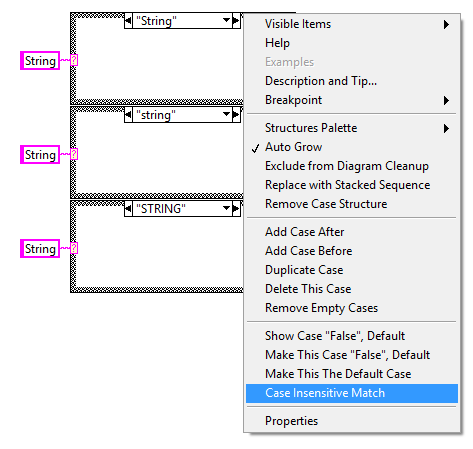
Another setting for the Case Structure selector when using strings, is to set the selector to no be case sensitive. This setting should not be used all of the time, but does come in handy in some use cases.
Customising controls:
Controls are relatively easy to customise when you know which ones are best to use and where to start.
Start with a blank control file (.ctl) and place down the control you want to edit. I find that the best controls to edit are the Classic Controls. Below I have added a Gauge from the Classic Controls pallet.
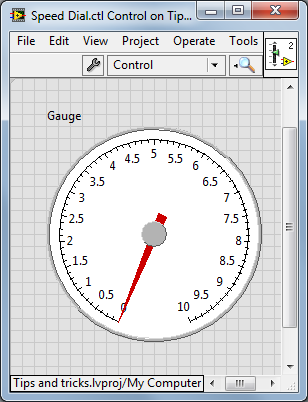
Click on the spanner in the toolbar and you will notice that the control gets split into its elements. I have changed the background colour so that the element borders can be seen clearer.
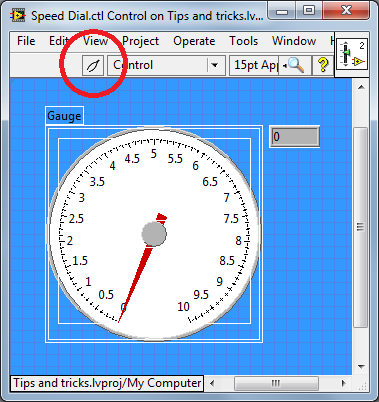
By using the Tools Pallet and the paint brush, you are able to change the colour of each element within the gauge. If you want the add an image to the background, the white area in the above image, right click on the background, select Import from File at Same Size. Then select the file and it will appear as the background image.
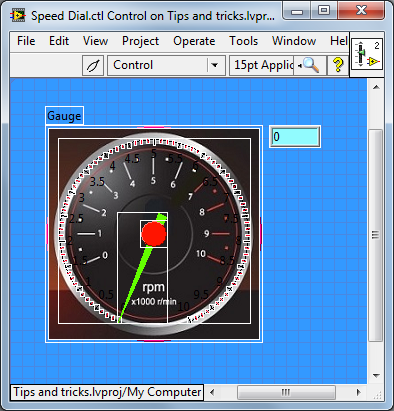
Once you have edited the control as you need, click on the tweezer and the control will be taken out of edit mode.
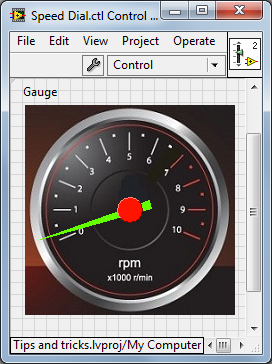
This is a very quick and rough example, but you can now make very complex and graphical designs with the help of some image editing software to get the base images.
Quick Drop:
I have been using the basic quick drop for a while now and I know many people do use it so am not going to go into it with too much detail. One point that I would like to make is something that I only found out this week. You are able to configure the settings and also use shortcuts instead of typing the whole word of the function.
To get to the settings window, use CTRL+space to bring up the quick drop window, then select Configure in the bottom right corner of the window. Here you will be able to change the settings, add short cuts and view what all you can do with quick drop.
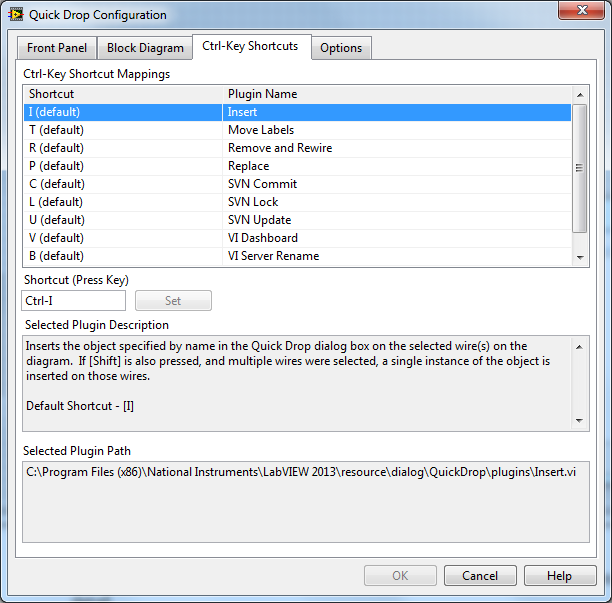
CTRL+T is one that I found out about this week and am already using it every day.
That’s about all for today. When I think of some more tips and tricks I will be sure to update this post or write a new one if I can get a few more. The vi’s that I have used in the above examples can be found below.
If you have any comments, tips or advice, please send me an email or leave a comment on Google+ as I have disabled comments here to try and control spam.
Download Tips and Tricks LabVIEW Code
Greg